A new measurement concept aims to set a standard that promises to get at real-world levels of precision in motion control systems.
Bill Hennessey • CEO/Founder • ALIO Industries
Technological advancements often require a root and branch change in the language and nature of discussion associated with them.
Consider the case of electricity. When it became available in every home, it would have been unrealistic and not helpful if people continued to talk in terms of preferred candles rather than the relative luminescence and longevity of various forms of light bulbs. Likewise, when the automobile began to emerge and eventually replaced the horse and cart as the most efficient form of transportation, the discussion naturally switched from the best hay to feed the horse to the merits of different forms of internal combustion.
Without stretching this analogy to a breaking point, there is a similar shift in the area of motion control. Emerging new technologies push the boundaries of what is deemed possible in terms of precision to such an extent that the language surrounding the technology has to change, and the nature of the conversation needs to shift in order to differentiate this new technology from standard industry alternatives.
Over the last several decades, there has been more interest in hexapods to cater to the increased demand for micron and sub-micron level precision in multi-axis motion applications. Hexapod motion control technology exists at the ultra-precision end of motion control, and it has become the best-in-class motion control solution for exacting industrial applications.
The burgeoning area of more precise motion control is driven by industry demand for technologies that will improve production processes. The emphasis from across industry is for smarter, smaller, and faster precision motion control and positioning equipment, and demand is especially high in areas like laser micro machining, micro assembly automation, optical inspection, semiconductor metrology, and photonics components test and alignment applications.

One key area for focus is how motion control process suppliers describe the level of precision achievable. Standard industry vernacular talks in terms of micron and sub-micron precision, but the idea of Point Precision is a new and more effective methodology of measuring and quantifying motion systems.
What does precision really mean?
Often times, the way the word “precise” is used in the motion control industry can be vague. Similar confusion surrounds terms like “resolution” and “accuracy” which are often deployed to imply that one’s product offers superior precision or accuracy.
In the area of motion control the focus should and must be on much more exacting criteria, by which we mean repeatability and accuracy. Also, what is often the case is that claims of precision for standard hexapods are based on best or ideal conditions, typically unidirectional one axis numbers. These figures typically don’t factor in all of the six-axis error quotients or the backlash, which is the total error of all motion due to the compression and tension of each leg for every move. This can make claims about precision highly suspect. However, giving precision or accuracy figures with reference to terms such as micron, sub-micron, or nano precision provides more insight into the level of precision being claimed.
Point Precision: the basics
The concept of Point Precision includes all six degrees of freedom of errors of each axis in motion, guaranteeing the precision point in the full work envelope.
Here’s how it works:
Repeatability of a functional point attached to a linear or angular motion axis is commonly specified as a one-dimensional linear measurement. However, the three-dimensional repeatability of a functional point (linear, straightness, and flatness repeatability) is critical for many applications. Characterizing the repeatability of a functional point in three-dimensional space at specified target positions can be achieved using existing methods and equipment, for example: 6D laser measurement system, laser tracker, straightedge, angular interferometer, etc. However, the measurement uncertainty may be too high, the equipment may be too expensive and too large, and with some methods and equipment, it may be too time consuming to measure the repeatability in three directions.

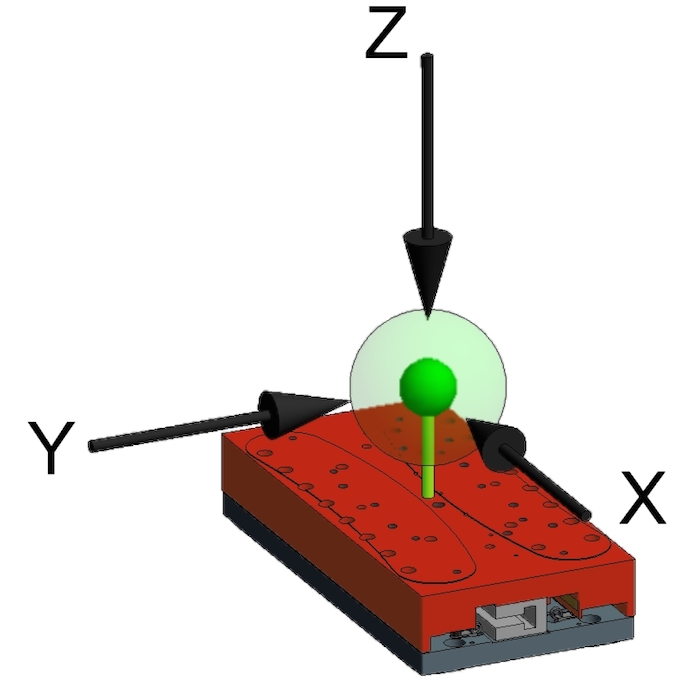
The concept of “point repeatability” is a measure of repeatability in three dimensional space and presents a simplified method for quickly characterizing this repeatability in three directions (X,Y,Z) using displacement sensors. The method enables characterization of repeatability of target positions at the nanometer level with appropriate uncertainty ratios. Test setup and equipment are common, cost effective, and can quickly be setup to test high precision angular and linear axes.
This method is presented for single axis systems. However, the potential application to multi-axis systems is also noted because it captures statistically significant repeatability errors that are often neglected when a multi-axis system is characterized on a per axis basis.
Each axis of a motion system has errors in six degrees of freedom, and all error sources are statistically significant when characterizing the repeatability of a point in three-dimensional space. The test method is designed to be a simplified method focused on collecting the X, Y, and Z distributions of the repeatability data of a few target positions of a functional point attached to a stage.

So point repeatability can be defined as a measure of the ability of a motion system to sequentially position a functional point fixed to a stage to a target position with respect to a fixed three-dimensional reference frame.
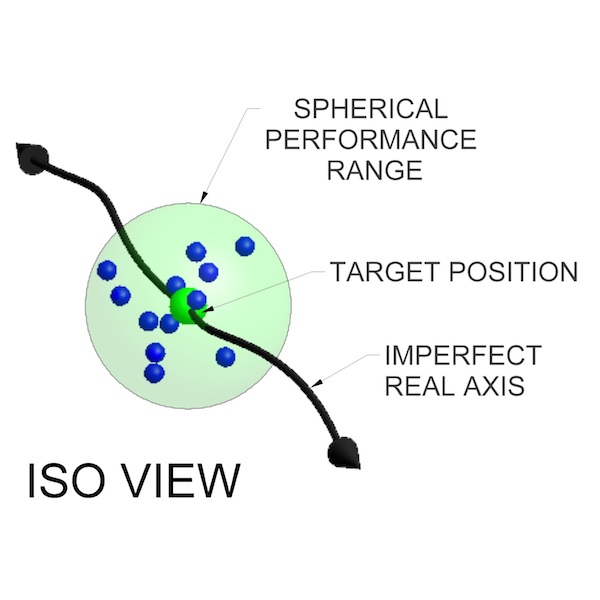
Over many cycles, the test point locations will create a three-dimensional distribution of points and the shape of the distribution will vary from stage to stage or manufacturer to manufacturer. The point repeatability tolerance zone is the three-dimensional tolerance zone characterized the X, Y, and Z components of the repeatability performance around a target position of a point repeatability test. The X, Y, and Z components are all presented so the actual tolerance zone geometry and distribution is known.
Summary
There are numerous companies working in the area of micro and nano manufacturing providing industry with solutions that stimulate innovation and advance the chances of achieving success in ever more exacting precision engineering applications. They strive to provide technology solutions that facilitate greater precision, which is consistently demanded across industry.
ALIO has adopted a new approach to address the lack of clarity that exists specifically in the area of motion control solutions. The creation with the NIST of the Point Precision will provide the future standard methodology of measuring and quantifying motion systems in the area of nanometer precision.
ALIO Industries, Inc.
www.alioindustries.com


Leave a Reply
You must be logged in to post a comment.